Sunday, May 22, 2011

Bold with Blue


Give your eyes some sparkle with blue eyeliner on the lower lashline. This will give the neutral eye a fresh, summery pop of color as well. Because it is so simple, this look is a great casual, playful look that can be worn anywhere. I've worn it many times myself and I love it!

1. Prime your eyelids with a good primer, such as NYX's Eyeshadow Base. Make sure to apply a bit under your eyes and to the inner corners to keep the shadows lasting long.

2. Apply a shimmery champagne colored eyeshadow, like Estee Lauder's Pure Color Eyeshadow in 'Glistening Gold', to the browbone to highlight it.

3. Sweep a shimmery brown color over the whole lid for a wash of color. I love how Estee Lauder's Pure Color Eyeshadow in 'Sandbar Beige' gives a brightening effect to the eyes.

4. Apply a warm, chocolate brown color, such as Estee Lauder's Pure Color Eyeshadow in 'Hot Cinnamon' to the crease and outer 'v'. Keep this light, you don't want too dark of a color on your eye.

5. Take a small liner brush, such as the MAC 209 Eye Liner Brush, and carefully line your lower lashline with a bold, bright blue. I love MAC's Eye Shadow in 'Freshwater'.

6. Using a small brush, apply a shimmery light colored highlight, like MAC's Eyeshadow in 'White Frost', on the inner corner.

7. Finish off with a black eyeliner on the lash line and mascara. I love Covergirl's Liquiline Blast and Maybelline's Full N' Soft Mascara.

Hope you guys enjoyed this look(:

Smoky Plums And Greys


This is a pretty, softer version of the traditional smoky eye, using various shades of gray and plum to create a eye brightening evening look. Toned down, this could also work for day looks as well. I've worn this out a few times and have loved how it illuminates the face. Hope you like it!

1. Prime your eyelids with a primer. Then, apply a highlight color to your browbone and inner corner. I used MAC's 'Shroom' eyeshadow.

2. Apply a very light lilac color to the whole lid. I used the lighter color in the Victoria's Secret Eyeshadow Duo in the color 'First Glance' for this. Then, with a small, fluffy shader brush, apply the dark, shimmery color into the crease very lightly.

3. Take a small fluffy, angled brush and pack it with a matte dark plum color. I used a color from an Estee Lauder palette, however MAC's 'Trax' eyeshadow is a good dupe for that color.

4. Line your eyelid with a dark liner, such as L'oreal Telescopic Precision Liquid EyeLiner. Then, line about 1/3 of your waterline from the outside with a black pencil. I used Covergirl's Liquiline Blast Eyeliner.

5. Finish off with a good mascara. I love L'oreal's Voluminous Mascara.

Well, there's the look! I love wearing this as a lighter formal look. This is perfect for summer as well. Hope you guys enjoyed it! (:

Thursday, May 5, 2011

My Photography

Hello, everyone!(:
Now, I know this is mainly a beauty and fashion blog, however, my camera decided to cooperate with me these past few weeks, so I took a ton of pictures of random things.
Sooo, this will be a quick post of just my pictures. (:

So, those are a few pictures. Tell me what you think(:

Covergirl LashBlast Fusion Mascara Review

It seems as though literally everybody has tested out this mascara! However, I chose to stay true to my Maybelline Full N' Soft. It's not often that I pick up products to just randomly test, especially not mascara. It's quite hard to find a good mascara, so when I do, I stick to it. However, since it seemed as though everyone except for me had purchased one of these, I decided to pick a tube up for about $9 while I was at my local drugstore.

So, this is what the tube looks like. Pretty snazzy, isn't it? I love the color and the shiny lettering. It looks really nice.
The first thing I noticed about this mascara, was the applicator. It has a very, very big applicator, and I was so afraid I would poke my eyes with it. However, I got the hang of it in a bit, and loved using it. The applicator is shaped a bit like a comb, separating lashes.
However, the formula was a bit too clumpy for the price. It took a bit to separate lashes after a coat.

This is what my lashes looked like after one coat;

In conclusion, I will not purchase this again, but I will probably use up the whole tube.

Monday, April 18, 2011

Glittering Green Eyes Tutorial


1. Follow your usual foundation routine. Then, apply a peachy pink blush to the apples of your cheeks and up your cheekbones to your temples. I used Estee Lauder's Silky Powder Blush in 'Sweet Nectar'. Again, on the website, the color looks very muted. It's much more vibrant in reality.

2. Contour your cheekbones with some bronzer and then use a powder brush to dust some bronzer all over your face. The bronzer I used was Maybelline's Fit Me Bronzer. It has a bit of shimmer in it as well to illuminate your face.

3. Next, prime your eyelids with a good eyeshadow base or primer to make your eyeshadow look vibrant and keep it on longer. I used NYX's Eyeshadow Base.

4. Highlight your brow with a shimmery champagne color, such as Estee Lauder's Pure Color Eyeshadow in 'Glistening Gold'. Also, apply some to the inner corners of the eyes so make them look brighter and wider.

5. Then, apply a shimmery forest green color to the entire lid using a MAC 213 Brush. I used Estee Lauder's Pure Color Eyeshadow in 'Ivy Envy'.

6. After this, apply a darker green color, such as Estee Lauder's Pure Color Eyeshadow in 'Emerald Star' in your crease and outer 'v'. Then, sweep a gray-green color into about half the eyelid from the outer 'v'. I used Estee Lauder's Pure Color Eyeshadow in 'Enchanted Forest'.

7. Line your upper lashline with a dark black liner, such as L'oreal's Telescopic Precision Liquid Liner. Then, use a pencil liner on about 1/4 of your lower lid under your lashes. Also, line your waterline. I used Ulta's Automatic Eyeliner in black.

8. Apply a coat of Maybelline's Full N' Soft Mascara for thick, long lashes.

And you're done! Hope you guys enjoy this look! :)

Saturday, April 16, 2011

Top 5 Nail Polishes

I love painting my nails different colors. I've noticed I've been gravitating towards matte bold colors a lot lately. Here are my top five most worn nail polishes recently. I hope you enjoy them as much as I do.

1. 'No Spain, No Gain" by OPI. I am in love with this color, and actually have it on at the moment. This is a beautiful matte berry, purple color. This picture does no justice to the gorgeousness of the color, I'm afraid. Hopefully, you get the idea of what a pretty color this is. With only one coat, you get a rich color on your nails. What more could one ask for?

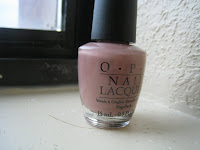
2. "Barefoot in Barcelona" by OPI. This is my go-to nail polish. It's a matte nude pink-y taupe color I really, really like. It goes with any outfit I can possibly think up and looks great with it too! It's a little bit of a warmer color than it looks like it the picture.

3. I didn't have many high hopes for this nail polish after already purchasing one years ago from Claire's. This I bought from their new line called Icing. However, I was definitely proved wrong after buying this; there's nothing wrong about it at all! The color is a gorgeous dark gold which looks great with just one coat and stays on for quite the while. I really like it!

4. "Russian Navy" by OPI was a purchase I made back in the fall, when the black nail polish trend was going on. I think black nail polish is a bit of a harsh color on anyone's nails, so I opted for this rich navy with purple undertones. And am I glad I did! This is a perfect color for the fall and the winter and looks very elegant, yet trendy.

5. This is a color I used to wear all the time, and then I completely forgot about. I recently came upon it while cleaning out my drawers. And I'm so glad I did! I plan on wearing this as much as I can during the spring and summer. This is a gorgeous matte color that looks very bright, even bordering neon on the nails. The sophistication of red and playfulness of orange, all in one bottle on gorgeousness.


Well, those are my top 5 nail polishes right now. Yours?

Tropical Sunset Eyes

Hey everyone! As the warm weather has been approaching, I've started to bring out my warmer, more daring shades. I've been wearing this look and I love it! It makes the whole face look as though it's glowing, very dewy and fresh. This would be great worn to school or at night, being as versatile as it is. I hope you guys like it!

1. Apply your foundation and concealer as usual. Then, apply a cream blush to your cheeks. Think of this as a base for your real blush. It will make your blush look more natural and keep it from fading. I used a really old cream blush by Clinique in 'Sweet Cheeks' that I doubt they sell any longer. A good alternative would be Revlon's Cream Blush in 'Berry Flirtatious'.

2. Then, apply your powder with a kabuki brush. Try to stay very light with the powder as you want dewy, fresh looking skin for this look. I used Covergirl's TruBlend Minerals Powder with an Avon Kabuki Brush.

3. Next, prime your eyelids with a an eyelid primer, such as NYX's Eyeshadow Base.

4. Apply a shimmery champagne color to the browbone and the inner tearducts using a small shader brush, such as MAC's 239 Brush. I used Estee Lauder Pure Color Eyeshadow in 'Glistening Gold'. This makes the eye look wider and brighter.

5. Then, apply a copper color, such as the second color from the left in the Maybelline Color Plush Silk Eyeshadow Palette in 'Copper Chic', to the whole lid with a MAC 231 Brush. Next, apply a orangish gold color to the space between the copper and highlight color, with the other side of the brush.

6. Apply a warm plum-y brown color in the crease and outer 'v' of the eye. I used Estee Lauder Pure Color Eyeshadow in "Smoky Ember".

7. Line your upper lashline with a black liquid liner, such as L'oreal's Telescopic Precision Liquid Eyeliner.

8. Apply a coat of Maybelline's Full N' Soft Mascara for thick, long lashes.

9. Apply a peachy colored blush to the apples of your cheeks. I used Estee Lauder's Silky Powder Blush in 'Sweet Nectar'. On the website, the color looks very dull and muted, but in real life, the color is a gorgeous orange-ish peach color. I love it.

10. Finally, finish off the look with a nice, nude lipstick and berry tinged lipgloss. I love my Bobbi Brown Lip Color in 'Bare' topped off with Maybelline's Shine Sensational Lipgloss in 'Sparkling Grape'.

I hope you all enjoyed this look. (: Feel free to message me or comment with requests, questions, or suggestions!